Sunday, April 25, 2010

2 walls sheathed, 3 walls raised


2 walls sheathed, 3 walls raised
Originally uploaded by justinmaple

The South and East walls have now been fully sheathed. Last night Chrissy and I raised the North wall by ourselves (not the best plan yet). I'll put the sheathing on it today and finish up the three small sections of walls that go up for the West wall (the one with two garage doors.

New North wall, one door, one small window


New North wall, one door, one small window
Originally uploaded by justinmaple

North wall with have a small window above the sink and a door near the back side. You can see a black pipe coming up out of the pad there, its a drain that we insulated last year that runs down the hill a bit. I am figuring we can hook up the sink and a small pump shower to it to save from having to empty a slop bucket all the time. We ran some string down the whole thing so we can pull some ice melting wire thing down through there if we need to. (Its a thermostat and jacketed wire made to melt ice out of gutters that seems like it may work for keeping this thing ice free @ -30.)

Almost a building


Almost a building
Originally uploaded by justinmaple

Three walls, well on our way to having a place to live.

checking level


checking level
Originally uploaded by justinmaple

I obsess about making these walls level and straight.

built, ready to raise.


built, ready to raise.
Originally uploaded by justinmaple

The compressor had a blowout just as we were about to shoot the last few nails into this section of wall. Took half an hour just to remove all the odd sized and style screws in the top to get inside it. Poor craftsmanship makes for poor products that break too easily and in this case, Bostitch cut some corners when they were making these compressors.

You can see the Garage Door headers on the slab there, monsters.

South wall, half sheathed


South wall, half sheathed
Originally uploaded by justinmaple

Since we raised this wall without sheathing (because it was so heavy with this giant header that spans three windows) we put the sheathing on horizontally. For what it was worth, this worked out pretty well.

nailing


nailing
Originally uploaded by justinmaple

hardass


hardass
Originally uploaded by justinmaple

nailing up sheathing made easy with pneumatics.

From above


From above
Originally uploaded by justinmaple

putting walls together.

Cutting plywood for sheathing


Cutting plywood for sheathing
Originally uploaded by justinmaple

Chrissy cutting ply for sheathing the south wall. I love the wood grain mixed with the top half of the circular saw.

Thursday, April 22, 2010

Getting into the swing of things

So, its officially spring around here. Its been in the 50's and sunny during the day, even had a few days last weekend that hit 60 and 70 out at our property. Pulled the plug on the lights in the chicken coop last week and they are hovering around 57, night and day.

Great building weather is what it amounts to for us right now though, but unfortunately, this great building weather is being accented by 9 credit hours of school work. All of it wrapping up and coming to a head in the first part of May.
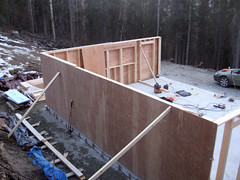
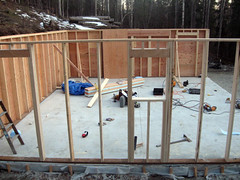
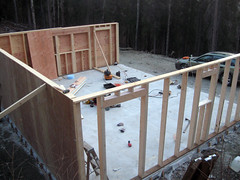
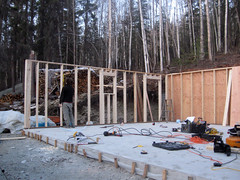
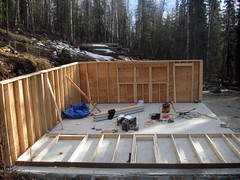
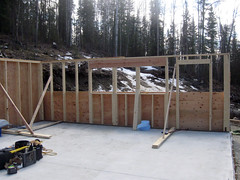
Chrissy takes a trip to Washington DC with her class next week and shortly thereafter I am headed back to the Bluegrass for a wedding. Once that all wraps up, its full steam ahead and this garage should be knocked out quick. With the exception of learning a fair amount more about electricity, I think we have most of the knowledge we will need to finish it up.
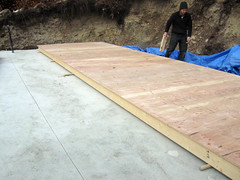
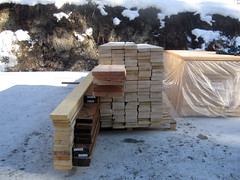
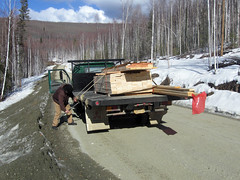
Our 34' roof trusses have been ordered and should be arriving in the next week or so, the plan is to get them raised before the middle of May and capped with plywood and bituthene so we can fend off rain with a real roof (of sorts) until we can afford the metal roofing that will finish it off.

Chrissy and I are both anxiously awaiting the day that we can start redirecting some of our hard earned money back towards ourselves. We have been living on a strict budget for the last year or so that would probably make most people cringe.

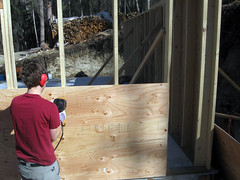
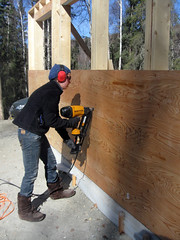
We'll keep posting photos as we take them and as we get more work done. Cant wait for the summer to come and wrapping up this project, lots of trips to take, stuff to see along with fishing and hunting to get out and do.
Back to studying for me, just needed a quick break to ease my mind.
-Justin

Sunday, April 18, 2010

Two Walls we own


Two Walls we own
Originally uploaded by justinmaple

A hard days work and some nice results.

Justin and Chrissy


Justin and Chrissy
Originally uploaded by justinmaple

12 hour day. Nothing better.

Raising the south wall


Raising the south wall
Originally uploaded by justinmaple

Wall is raised, now time to negotiate it into place over its bolts.

East wall is up


East wall is up
Originally uploaded by justinmaple

A real wall!

tightening the J bolts on the east wall


tightening the J bolts on the east wall
Originally uploaded by justinmaple

Wall is up, tightening down the bolts to hold it in place. Finally, a wall that starts to give an idea of what size this place is going to be.

Getting ready for lifting


Getting ready for lifting
Originally uploaded by justinmaple

Sill sealer is in place, J bolts have been cleaned of tape from last fall (to keep them concrete free) Ready for some heavy lifting!

Framing


Framing
Originally uploaded by justinmaple

Gunnar lounging while we're hard at work.

Photobomb


Photobomb
Originally uploaded by justinmaple

I could see Chrissy taking these myspace style self shots, so I snuck into one. My expression is intentionally bizarre.

Grinning


Grinnin
Originally uploaded by justinmaple

Chrissy looking nice

Framing


Framing
Originally uploaded by justinmaple

Framing the South wall, big headers for lots of windows!

using dowel rods to move the east wall


using dowel rods to move the east wall
Originally uploaded by justinmaple

This thing was heavy and too much to lug around so we started using dowel rods to roll it.

On our way out today


On our way out today
Originally uploaded by justinmaple

Baby moose the size of horses.

Plywood


Plywood
Originally uploaded by justinmaple

Last sheet and the wall is done. Squared up and good to go.

sheathing


sheathing
Originally uploaded by justinmaple

sheathing the east wall before its raised

Sunday, April 4, 2010

Us.


Us.
Originally uploaded by justinmaple

All nailed together


All nailed together
Originally uploaded by justinmaple

1st wall, ready for sheathing. I picked up 12d nails instead of 8d for the sheathing which has about a $50 difference in cost. Rather than use the expensive ones, we decided to return them for the lesser ones and finish the sheathing in a few days.

Layout


Layout
Originally uploaded by justinmaple

scattering the wall studs. We picked this wall to do first because it has no windows and no doors. Nice and easy.

sill plate


sill plate
Originally uploaded by justinmaple

First section of sill plate and top plate for the east wall. Holes drilled, marks made, ready to scatter lumber.

Angle grinder


Angle grinder
Originally uploaded by justinmaple

Chrissy working the angle grinder over the edges. We're cutting off any of the rough spots so the sill plates all lay down flat.

Brought down the driveway


Brought down the driveway
Originally uploaded by justinmaple

Shuttled down the driveway in our truck. We thought this part was going to take alot longer than it did.

Lumber delivery


Delivery
Originally uploaded by justinmaple

Plywood was delivered the day before and a fork truck got down the driveway with it.
The driver from Northland Wood wasn't as interested in trying out the driveway, so he left the lumber up on the main roadway.